Adjusting Iwata trigger/airflow

K

Killavolt

Guest
Just curious if there's a way to adjust the trigger on an Iwata Eclipse CS to have more travel, or be more sensitive or something.

I know I need to build up muscle memory since I'm new but I'm finding it very hard to both press the trigger very lightly and slide it back at the same time without pressing down fully and blasting out paint.

tips and tricks are also welcome :)
 
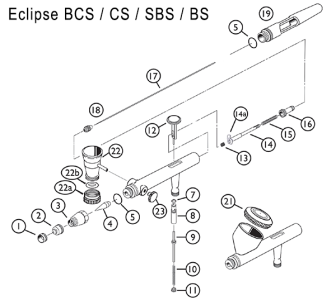
You can lighten up the tension on the trigger #16 on the diagram.
eclparts600px.png
But you should be fully pressing the trigger downward all the way and slowing pulling it back for paint on.
Me I like a stiffer trigger so I have a more rigid spring vs the softer one most like to install.
Mainly it sound more like you need to practice the dagger strokes more to build your muscle memory up so you can gain more control on the airbrush.
But you always want full airflow if the pressure is to high for your paint reduction you turn down the regulator on the compressor or buy a handle mounted mac valve .
 
Adjust your air with the regulator not the trigger.
You CAN adjust the air SOME with the trigger, but its kind of secondary and only a few people do it at all from what I gather. Then its only after having set a good pressure that works with it fully depressed anyhow.
 
Last edited:
depending on how big your hands are you could consider to ad a trigger cap to make the trigger higher for more movement and control but the best thing imo is to work with the original trigger and build that muscle memory up you can control the airflow by adding a macvalve to your airbrush
 
ok I wasn't sure if the trigger itself was meant for fine air control or not, so It's fine as it is then. I can use a MAC valve if need be. It's good to know this stuff though as I wasn't aware before.

I kind of like the idea of a trigger cap, it's sort of like Kontrol Freeks for console controllers which I use and love.
Here is a view from a total noob. :)
I had and still have bunch of issues, but I am gonna share what is working with my no skills so far. Blasting paint was a big problem for me. Somethimes no paint won't come out from airbrush and I am pulling the trigger further and further back and suddenly I get full blast. And big circle of paint is on my ''work''. I didn't want to remove needle guard, and thank god I didn't cause when I was practising my dagger strokes I hit with the needle guard to the surface of my work... And I did that few times...

So first I wonted to resolve tip dry issue, but it is difficult to clean needle, if you have needle guard on. I found this video on you tube:

And I modified this idea a little cause I use needle guard similar to the one you get when you buy airbrush, but you can use it even if you do close to surface work:
https://www.air-craft.net/cgi-bin/b....pl&PRODUCTPAGE=Iwata-Crown-Cap.html#SID=1409

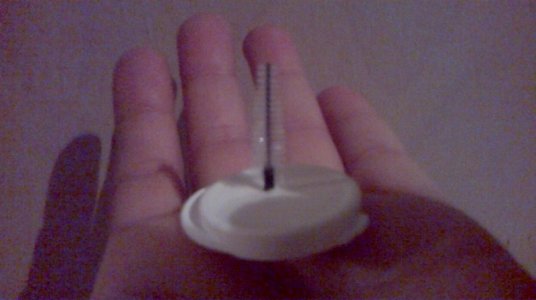
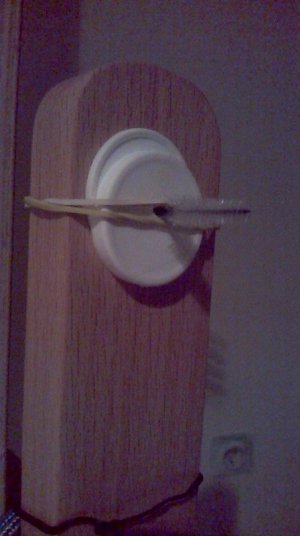
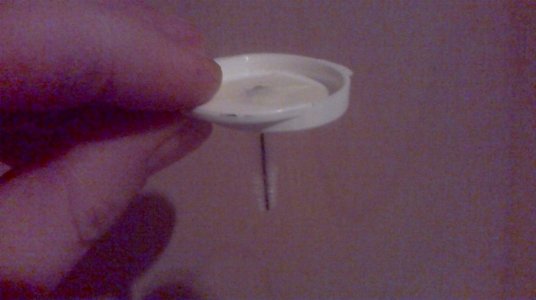
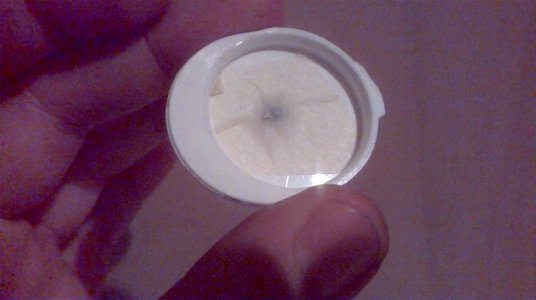
Here are pictures of modified idea. I used one of dental brushes which I am using them for cleaning airbrush and I got 5 pieces in a pack. The trick is dental airbrush can clean needle tip even if you use needle guard. It is so small and I just press my airbrush to the device I made for myself:
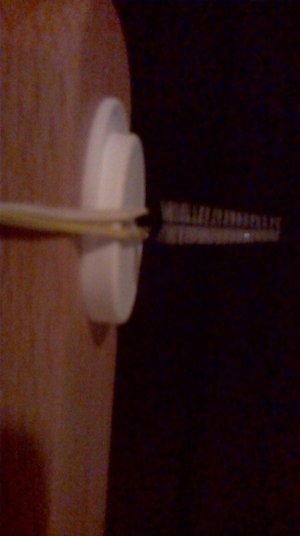
WP_20180127_002.jpg WP_20180127_003.jpg WP_20180127_001.jpg WP_20180127_004.jpg WP_20180127_005.jpg WP_20180127_006.jpg

Just like you see I used 2 rubbers so I could fixate that to the side of my easel. After I press my needle to this little sucker i spray a little paint to the paper which I have only for testing if I still have tip dry. (yea I know I am a noob, who cares) At least I am not picking my needle with my fingers and destroying needles when I hit surface of my easel :p

Cause I still don't have muscle memory I use this:
https://www.air-craft.net/cgi-bin/b...a-Preset-Cut-OutHandle-IWS-1556.html#SID=1409

It works for me great if I am working on something, but when I practise on a paper I don't use this. Then I am working on my control.

I 2 have the issue with pressing trigger a little down and doing a control with that, and all guys sad that I should use regulator for this. But I think I am doing that cause I am scared of pushing to much paint out of airbrush. But I am better each day and I don't think about that anymore. I am trying to get the feeling that my airbrush is extension of my mind and whatever style I will use and will work for me is ok.

Control freak thingy works and many users use that kinda solutions for getting more control(at least on you tube). I was thinking about it, but I didn't go for it, cause there is a bunch of stuff which need to become part of me and I seen bunch of master which don't use that and still do phenomenal work.
 
@huskystafford ....At the top of this site there is a link ‘tutorial’ that will take you across to the airbrush tutor Website, the video you posted is from that website and that is Mitch Lowther, the founder of this airbrush forum.
When you register on the airbrush tutor website (it’s not linked in with this site so you’ll need to register there) you’ll be able to download the free training exercise sheets, have access to free information videos as well as purchase detailed step by step tutorials.
Thank you. I will check it out. I definitely need all the help I can get :D
 
That's pretty much what I'm experiencing right now, I'm pulling the trigger back further and further and find myself thinking "I swear that paint should be coming out now" then next thing you know I have a giant gob on my model.
 
That's pretty much what I'm experiencing right now, I'm pulling the trigger back further and further and find myself thinking "I swear that paint should be coming out now" then next thing you know I have a giant gob on my model.
Now you got few ideas how to fight it.
 
I do have a crown cap so maybe I should be using that? The only reason I haven't yet is because I've been using the backflow method to mix paint in the cup.
I haven't actually done much as of yet though, but right now I'm painting warhammer figures and using the airbrush for base coats. it works great but just the slightest amount of too much paint can fill in details.

I don't actually get a gob, just a round spot where the paint runs away from the air then dries in a noticeable manner when I spray over top of it again.
Just so understand each other. I am total noob :D But here is a nice video about regular or crown cap differences if you didn't catch that anywhere


Here is elegant and cheap solution, but I don't know if it fits your airbrush.
https://www.airbrush4you.de/h-s-reinigungskappe-gelb/a-127990/

and here is how few guys do it(posted by other people):
qoute 1:
I use a short piece of hose, plugged in one end, slightly smaller in diameter than the airbrush body, but large enough to push the airbrush nose, including the Crown cap inside.

quote 2:
Have you tried putting a cotton bud or similar over the needle to seal the end to back flush ?

quote 3:
Unscrew the needle securing nut, slightly withdraw the needle from the front, and then you can do the cotton bud trick without damaging the needle.
 
Last edited:
My brainstorming would be try to find marker and see if cap from the marker fits and try to backflush -.-
Does it sound stupid? -.-
 
and here is how few guys do it(posted by other people):
qoute 1:
I use a short piece of hose, plugged in one end, slightly smaller in diameter than the airbrush body, but large enough to push the airbrush nose, including the Crown cap inside.
quote 2:
Have you tried putting a cotton bud or similar over the needle to seal the end to back flush ?
quote 3:
Unscrew the needle securing nut, slightly withdraw the needle from the front, and then you can do the cotton bud trick without damaging the needle.

Hmmm..... not sure about these suggestions.
for Backflushing only quote 1 would be acceptable
.
Quote 2: putting anything into the crown cap risks damage to the needle,
Quote 3: if you withdraw the needle the very tip of the nozzle is still exposed and you risk damaging that instead.

Backflushing isnt hard, you just need to block airflow out of the tip of the airbrush.... a piece of cloth / latex make up sponge and 'pinch' the tip and depress the trigger and slowly pull back on the trigger.

There is absolutely no need to purchase rubber caps, push foreign objects into the end.

As for tip dry, it will get less. The better your muscle memory the less you will get tip dry. its caused by paint drying on the tip of the needle.... if you remember to stop paint flow BEFORE stopping the air, the air blow excess paint of the tip.

When you do suffer tip dry you have to clean it off, end of story. Using your fingers shouldnt cause damage to your needle unless you have diamond tipped fingernails, using a toothbrush as per the video above wont hurt, using impregnated cotton tips and twirling it around the needle is effective.
@DaveG did a great tutorial - https://www.facebook.com/davegs.airbrush.exploration/posts/

If you wish to modify your aircap so that backflushing and cleaning the tip is easier but you still want to protect your needle from colliding with your substrate then check out @AndreZA Post on DIY aircap mod here http://www.airbrushforum.org/threads/needle-cap-mod.6833/#post-89678
 
Back
Top