Oh I remember these issues, it seems like yesterday.... technically about 4 years ago but I've only done a few paintings so these issues are still fresh in my memory LOL
Mr.Micron has got you headed in the right direction but I think you may have misread/misunderstood his comment of "3;1 reducer
aint and then add one drop at a time till it flows nicely... " you need to add one drop of paint at a time, not one drop of reducer
reducer thins the paint so if you've gone from 3 reducer to 5 then your paint is now thinner than it was before. Always put the reducer in the cup first, then the paint. Backflush to mix. (pinch the nozzle between your fingers then push the trigger for air and you should see bubbles in your cup/bottle. )
On that note, if you are getting bubbles in the cup, then you have very likely have a clog in the nozzle. If you have paint hitting the paper when you release the paint flow on the trigger (push the lever forward) then you also likely have a clog.
Are you having fun yet
I'm a very patient person and knew that airbrushing would be a big learning curve, but as you've found out, its soooooooo frustrating trying to get all the factors dialled in properly. Once you get your head around these common issues that's when you can start having fun.
Like many members here, I started with a two cheapo brushes, they taught me heaps and because they were cheap I wasn't too worried if I broke them. if nothing else they teach you how to tear a brush down for cleaning
Get a pressure gauge (or a new compressor with one) and an inline mac valve to fine tune pressure at the brush- it doesn't have a guage, but you adjust it like you would a hot/cold tap -- by trial and error
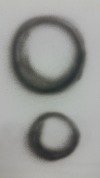
I started on glass, had the same experience as you with the spiders etc, but Mr.Micron is right, get that under control then every other surface is a lot easier.
we are here when you need a shoulder