jagardn's Log - Start Date Oct 12 - 2013

Getting ahead of the game, I started my next PaintPals piece last night. This one, I am working on putting a lot of detail on it. I got the base shapes sprayed and started on the some of details on the main focal point of the painting. Today I will be spraying in the base shadows and putting some color to the rest of the piece. I would post my progress on it, but don't want to ruin the surprise when we start the next round. :)
I do love Createx Illustration paints more every time I use them, the W500 reducer is working really well for me. My next painting I really should use ETAC, I just bought $200 worth of paint and have only done some practice drills and practicing detail with them.
 
Good idea to get a paintpal ready to go. Keep thinking I should do it myself, but that's all I do - think about it Lol!
 
Good idea to get a paintpal ready to go. Keep thinking I should do it myself, but that's all I do - think about it Lol!

I just found a cool reference on the web. I guess that's what it took to give me the kick in the ass. :)
 
Some Opaque color matching for my PaintPal project today.

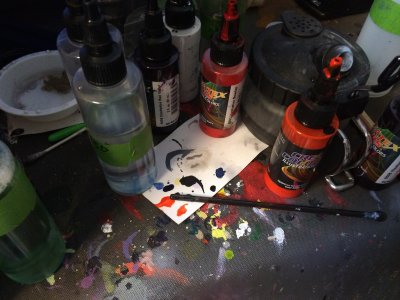
Here is what I use to do my color matching. (Some of the tools are from the Daniel Power DVD's, others are from Johannes Wessmark)


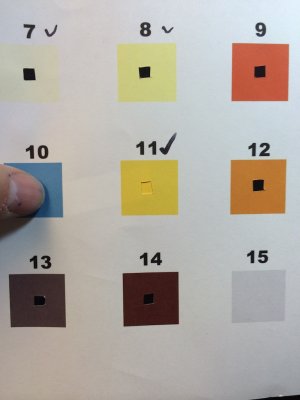
I print out color samples from the image using the eye dropper tool in a photo editing application(I use Pixelmator for Mac, Adobe Photoshop or GIMP work as well)
I cut about a 1/4" hole in the center of each color so I can isolate my paint sample and compare it to the color on the sheet.
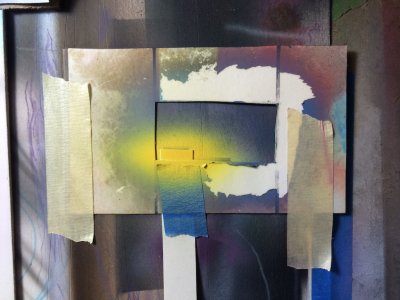
I cut strips of Photo Paper and spray on the back where the finish is Matte, I use the window I made to mask off a smaller area to minimize waste. I put the sprayed area in the hole I cut to compare and see which way the hue, chroma, and value need to be shifted.
For very small shifts in color, or when adding very dark or high chroma colors, I put a drop of the color I need to add, then just dab the end of a plastic drink stir stick.

jagardn_log_120113 IMG_3298.jpgjagardn_log_120113 IMG_3301.jpgjagardn_log_120113 IMG_3303.jpg

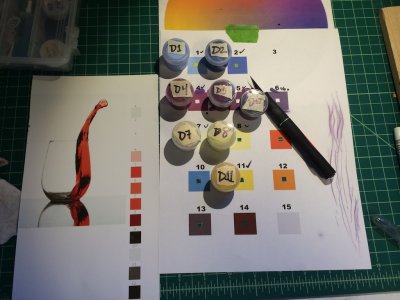
I bought some small paint cups off Amazon that I used for all my projects. Once my colors are matched, I label each one with the first letter of my project name followed by the number that was on the color swatch sheet. Off to the left is the reference from my last PaintPal, it is the one I am cutting up for this project.
Once the project is complete, I save the leftover paint, then in the next project I do, I can use it to match some similar color that is the same relative hue.
For this project in particular, I was able to re-use and shift the colors from 4 of the colors that were in my Bio-Mech piece.

jagardn_log_120113 IMG_3302.jpg
 
That is a lot of work for color matching. Maybe photo realism won't be my thing.


Sent from my iPad using Tapatalk HD
 
That is a lot of work for color matching. Maybe photo realism won't be my thing.


Sent from my iPad using Tapatalk HD

Yep, it is a lot of work, but opaque colors have the benefit of fixing mistakes a lot more than transparents.
Numbers 5 and 6 were a bitch, they were in the Red/Violet Blue/Violet area of the color wheel. Killing the chroma required a yellow/green and yellow/orange, getting that just right required a lot of back and forth.
 
Last edited:
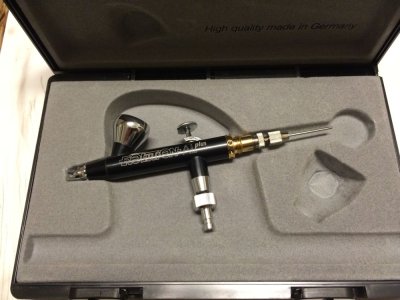
Some more practice with the new Evolution AL Plus tonight. The stock trigger spring was 20mm long, trimming it to 18mm's made it perfect for the trigger tension I like.
Trigger action is smooth now, and very responsive. I'm really liking the .2mm nozzle, it is great for detail and all around spraying, perfect for working on my PaintPal.
I got some more detail and shadowing on my PaintPal piece, I am really liking the way it's coming out so far. It's definitely more involved than my last one, 14 matched opaque paints, plus mixing transparents to tint and shift colors.
 
Tonight I was just doing some more detail practice with my Evolution AL, I still love this brush more every time I use it. I did just put some of my Christmas money toward a Custom Micron CM-C, it comes tomorrow, so I can put to some good use this weekend. I should also be finishing my PaintPal piece this weekend.
 
Tonight I decided to try out Javier Soto's techniques for doing an eye.

Createx and Airbrush Action posted a Video on YouTube as a Christmas gift to their subscribers. Here is a link to the video, it is a 30+ minute tutorial on painting an eye by using a base opaque flesh tone and tinting it to build the darker layers.

[video=youtube;w7tXoeYFJXI]https://www.youtube.com/watch?v=w7tXoeYFJXI&feature=youtu.be[/video]

I matched the mid tone of my reference with a homebrew flesh tone I mixed up with Createx Illustration paint.

Here is the progression so far.

Materials/Tools:
Crescent Illustration Board
H&S Evolution AL Plus .2mm
Createx Illustration Paints
4011 Reducer
4012 Reducer
Sakura Electric Eraser
Helix Electric Eraser
Faber Castel Pencil Eraser
Soft Large Eraser

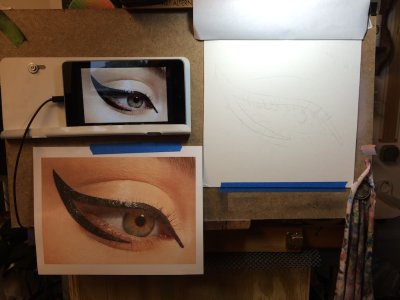
Lines transferred with Saral paper
Cat Eye Makeup IMG_3449.jpg
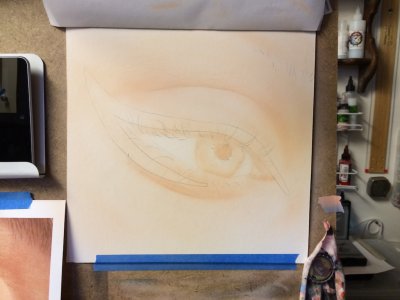
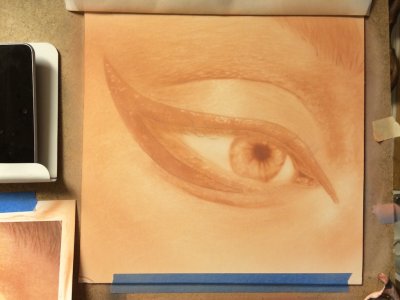
Base Shapes and shadows dusted in with base flesh tone reduced with 4011 Reducer.
Cat Eye Makeup IMG_3451.jpg
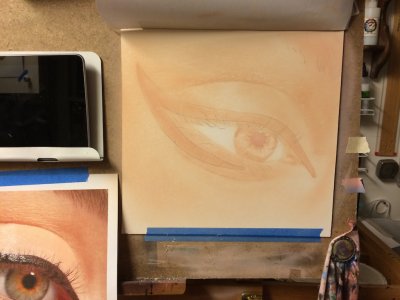
Base Fleshtone Complete
Cat Eye Makeup IMG_3452.jpg
Tinted the base flesh tone with some Red/Violet and Burnt Umber and reduced with 4012 Reducer.
Cat Eye Makeup IMG_3457.jpg
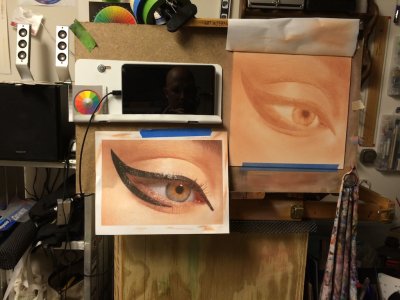
Closeup of the progress.
Cat Eye Makeup IMG_3459.jpg

The next step is the deepest of the flesh tones, tinting and coloring the eye then the detail work.

Thanks for looking! :)
 
Great start mate, I was thinking of doing it myself, it's a great free video and I recommend it to everyone!
 
Great start mate, I was thinking of doing it myself, it's a great free video and I recommend it to everyone!

This technique is much faster than matching a ton of opaque paints. If going for total photorealism, matched opaques work much better. For doing commissioned pieces, this would work great for profitability. Marissa's techniques are supposed to work quickly as well, I'm looking to take her class in June.
 
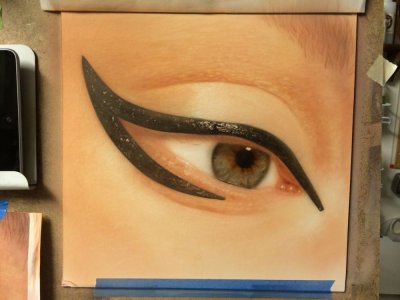
Made some progress on my eye project using the Javier Soto techniques.

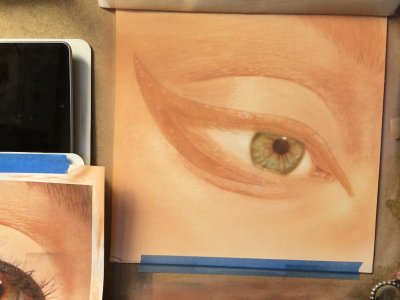
Started by tinting the eye with a grayish green(green with the chroma knocked down by adding red)
Cat Eye Makeup IMG_3465.jpg
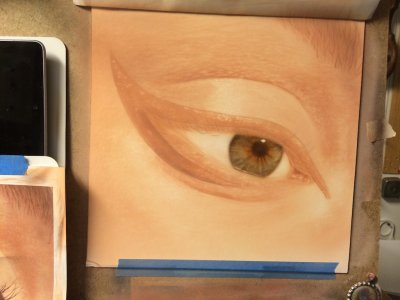
Shifted the tones with some trans blue and red
Cat Eye Makeup IMG_3466.jpg
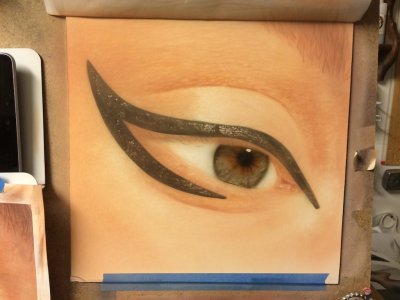
Started on the makeup using a black made with Blue, Red, and Yellow(it was darkened with a few drops of black)
Cat Eye Makeup IMG_3477.jpg
 
Hey it is another new guy:D Welcome home AirbrushTutor we have a great family here:D...LMAO

Look , it's the wily speckle throated, borrowing three toed Mitch! lol! Old Ren & Stimpy ref.


Sent from my iPad using Tapatalk HD
 
Hey Jeff - how are you going with the 10-15 hours a week buddy??

I'm pretty close to hitting it consistently. I usually paint for a few hours most nights, on the weekends I usually get some more time behind the brush.
I don't post everything I do on my log, most times it is just practicing reductions, trigger control, fine lines, fades, daggers, etc.
I'm still waiting on my December Protorial, just in case you thought we lost interest. ;) I know you are busy, but its still fun to bust your balls about it. :)
I hope all is going well, and we can see some more good stuff from our legendary mentor.
 
Got some more work done on the Eye painting tonight.
Darkened the Makeup some, re established some highlights, put in some of the red tones, and shifted some of the darker skin tones with some over reduced green.

IMG_3524.jpg

I also got the last of my parts in to convert my Evolution AL Plus to using an Infinity adjustable trigger mechanism. My one problem with the brush was the non-adjustable trigger. The parts cost me like an extra $20, so essentially I have an Aluminum Infinity now(which will probably be the next model they release). I still love this airbrush more and more every time I use it. The amount of control I can get with it for detail work and subtle areas is great, and it is so light, it feels like you don't even have an airbrush in your hand.

IMG_3525.jpg
 
Looking great Jeff mate, you have made a great job with the spectral highlights around they eye, not to much not to little, the little touch's of spectral highlights can make all the difference to the realism, keep it up bud:)

yeah you noticed the aussie is back in town, about bleeding time haha:)
 
Tonight was just practice doing fine lines and fades with my Micron and AL Plus. The AL Plus comes very close to what the Micron can do, but the Micron does edge it out a bit. Just a bit more fine control and pulling sharper finer lines, the difference is somewhat minimal, but still noticeable.
Once I finish my eye piece, it's back to the Horned Owl I have been working on for almost the past 9 months. LOL
 
Back
Top