J
Justg
Guest
No experience necessary:
The following is a helpful exercise in any medium for understanding shading that creates a three dimensional effect. It is also a helpful exercise to practice blending and easy frisket use.
As you will see there are also some helpful what not to do's as well.")
Use a metal compass (in protractor sets) to draw a circle on a piece of paper. And a ruler to draw a line behind which acts as a wall.
Place your frisket over and carefully cut out the circle.
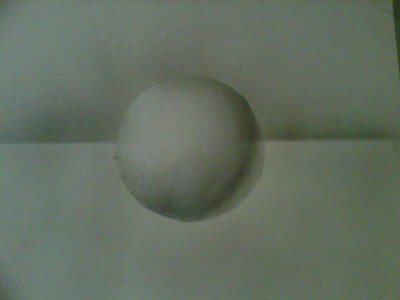
Determine where your light source is. In the 1st pic the light is coming from the left side near top. Remove circle area of frisket and carefully shade in opposite side.
Note: in shading it should get gradually darker with the darkest portion then a light portion again right at edge
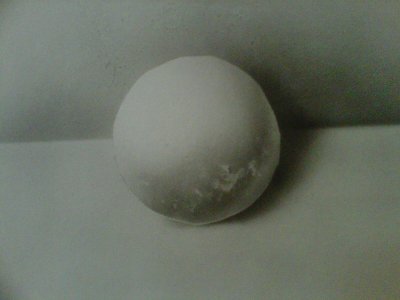
2nd Picture: background frisket removed and circle portion put back in place. Use a ruler to block paint to create the wall line.
3rd Picture: add shaded area to right side of ball.
Problems: Cutting frisket is not easy. As you can see in my picture the ball didn't come out perfectly round. This is mostly from rushing the cut.
Also, the frisket is stickier than I thought, as it came off it ripped the paper and left all kinds of marks.
Avoiding my pitfalls, I hope you find this a helpful 'creating 3 dimensional images' exercise.
The following is a helpful exercise in any medium for understanding shading that creates a three dimensional effect. It is also a helpful exercise to practice blending and easy frisket use.
As you will see there are also some helpful what not to do's as well.
Use a metal compass (in protractor sets) to draw a circle on a piece of paper. And a ruler to draw a line behind which acts as a wall.
Place your frisket over and carefully cut out the circle.
Determine where your light source is. In the 1st pic the light is coming from the left side near top. Remove circle area of frisket and carefully shade in opposite side.
Note: in shading it should get gradually darker with the darkest portion then a light portion again right at edge
2nd Picture: background frisket removed and circle portion put back in place. Use a ruler to block paint to create the wall line.
3rd Picture: add shaded area to right side of ball.
Problems: Cutting frisket is not easy. As you can see in my picture the ball didn't come out perfectly round. This is mostly from rushing the cut.
Also, the frisket is stickier than I thought, as it came off it ripped the paper and left all kinds of marks.
Avoiding my pitfalls, I hope you find this a helpful 'creating 3 dimensional images' exercise.
Attachments

Last edited by a moderator: