C
CanvasAirbrushing
Guest
Here it is if you haven't seen it.
Always prep canvases with a smile , clean and dry hands and work on a flat clean surface.
NOTE: You will need a good breathing mask for this as the binder will insure gesso will stick to the skin up your nose and sinus for weeks. I haven’t heard of anyone crying tears of gesso yet but anything’s possible. You should already have a good mask for airbrushing anyway which will be fine for this!!
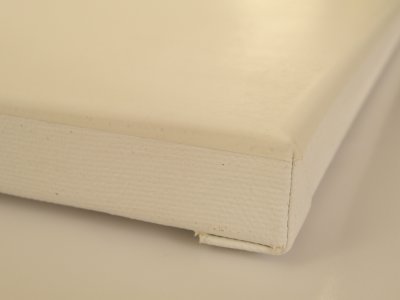
NOTE2: Most canvases today come “pre primed”. I highly recommend you still gesso them yourself. They use very little to prime and the quality of their primer is questionable. You will find the colours pop much more if you take the following steps.
Step 1 Canvas assembly
To assemble the canvas we must first complete the stretching process.
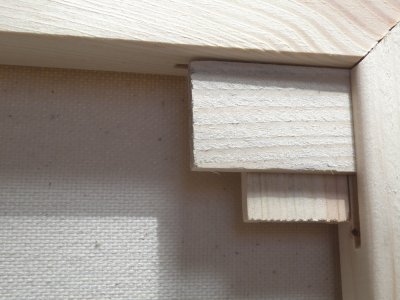
Apply PVA (wood glue) to each of the wedges provided with the canvas.
If you’re not confident enough to use glue, that’s ok. Follow the same procedures listed until you get more comfortable with assessing canvas tension.
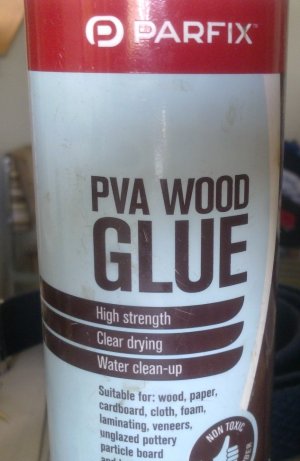
Insert each wedge as shown in the instructions that comes with the canvas. This requires a gentle tap with a hammer being carful not to allow the hammer to run along the back of the canvas as this will create push marks. Placing something flat and solid on the back of the canvas will help prevent this (like a clip board).
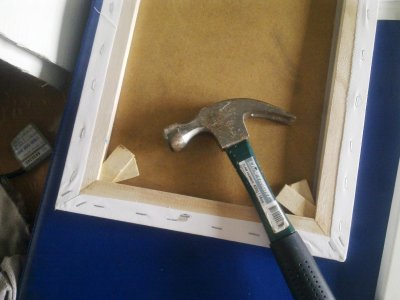
Start at one corner then work your way around the canvas in cross/diagonal fashion rather than clock/anti-clock wise.
Also, start with the bottom slits then when all the bottom ones are filled do the same with the top slits.
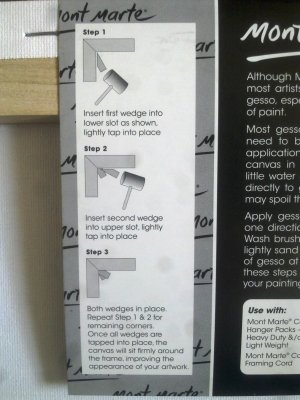
Once all the wedges are in with glue and gently hammered you should be able to hold the canvas by the frame at the back and gently tap the front part of the canvas in the middle with your hand (Like one would with a drum skin) and feel/hear some slight tension.
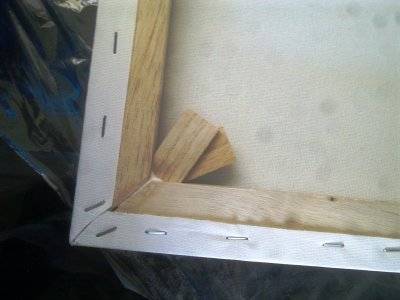
Now, with the PVA glue fill in any gaps that may appear at the corners where the wedges are. (This shouldn’t really happen; if it does you may have inserted the wedges with too much force.) Also, if the canvas has a single brace or cross brace, inspect them and if there is a gap fill them in with more glue.
I use the cardboard label that comes with the canvas to apply, and smooth off the glue for a neat finish.
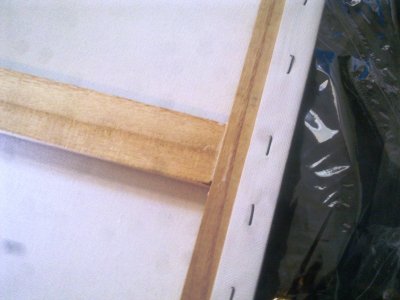
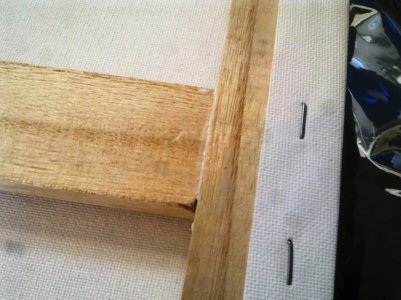
NOTE: do not get any glue on the canvas itself. Not on the front. Not on the back. As some paints will not be able to paint over it and you might end up with white spots that cant be painted over!!
NOTE2: Be careful not to make the tension too tight as this will lead to the frame warping. Once you coat the canvas in gesso it will shrink a little more. You’ll have to find through your own experience what the correct tension should be.
Step 1.1 Do this if the canvas is warped (otherwise move to step 2)
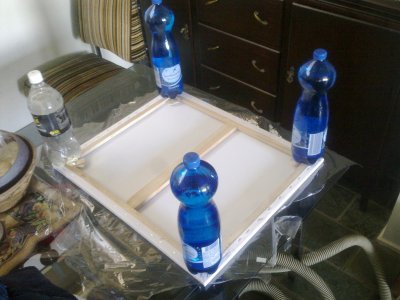
Once all wedges are glued in place and all hols are filled, before the glue dries, keep the canvas face down and put some weights on each corner. I use water bottles for this, but anything heavy and clean will do.
Step 2 Gesso preparation
Get your hands on your favourite brand of gesso. The more liquefied it is when you buy it the better in my experience. But it may differ depending on the brand. Trial and error is the only way to be sure here. The main thing here is to use a water based gesso, otherwise you’ll have to use other cutting liquids to think the mix out…. I don’t have any experience with that… maybe someone who does can make a little tute about it?
Next, get a clean (sealable) bottle and, to save potential confusion in the future, label it “Pre Mixed Gesso – Ready to spray!!”
In it pour the following ratios, 70% gesso 15% water 15% binder medium. These percentages may vary according to brand but this is a good mix to start if you’re not sure. Some thinker gesso's might require as much as 30% gesso, 30% water and 30% binder, if it’s too thick or too thin adjust ratios accordingly and make a note of it for next time.
NOTE: always put the same percentage of binder medium as you do water. So if you change it to 60%gesso it would then be 20% water and 20% binder. Easy.
Step 3 Spraying
Before spraying gesso insure the glue has fully dried, this may take a day or two depending on the climate. After you have applied the gesso it is also a good Idea to leave the canvas flat and for a week or two. This will allow the canvas frame to settle in to it’s new tension and allow you to notice if there are any issues.
Shake your “ready to spray” bottle very well.
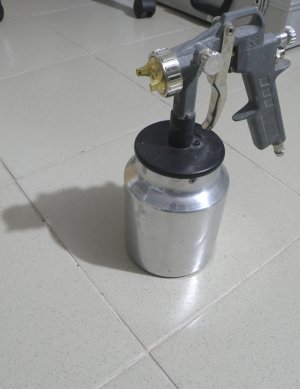
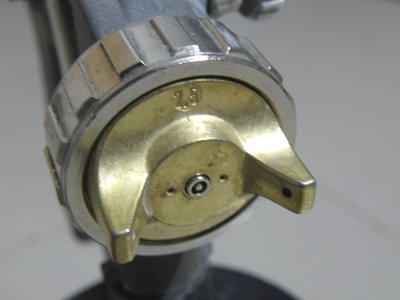
Then put it into a HVLP spray gun. Personally I have a cheap ($30) gravity feed HVLP with a 1.4mm setup which I use specifically for gesso base coats and final clear top coats.
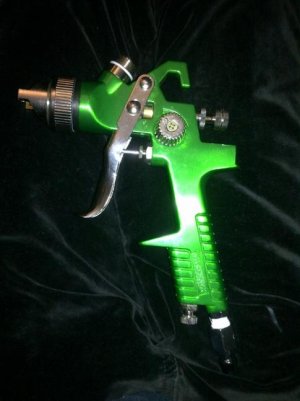
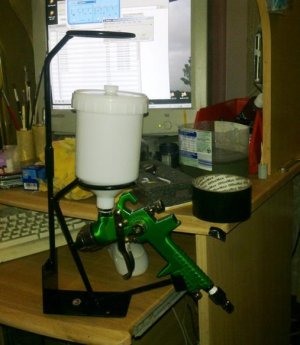
NOTE: Make sure the gun is well cleaned before going from gesso to clear tops coats…. Otherwise you’ll reach a new high score for cursing combinations.
NOTE2: Most spray guns come with a little internal filter. Make sure this is in the gun!!
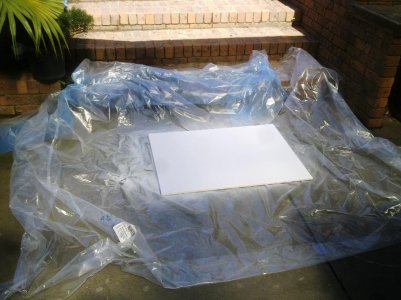
Spray a dust coat. This is also known as a dry coat because it is a very light application. This is done to “bridge” between the canvas and the next coast you will apply. If you skip this dust coat (not recommended) you may find adhesion issues.
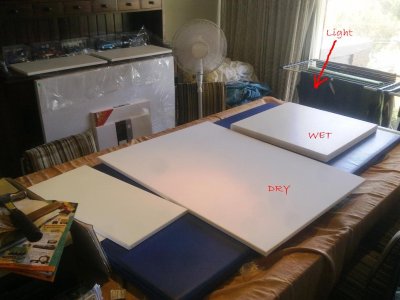
Next put the canvas in front of a fan to dry (any clean fan will do). This first dry coat will take about 1-2 min to dry. How will you know if it’s dry?? When the gesso is still wet it will have a gloss shine to it when viewed at an angle with lights. Once it’s matted out again it’s ready for the next coat.
Then spray more coats, wetter and wetter (thinker) until you’re happy with the surface coverage. This takes a little time but as you may know applying too many think coats from the start may cause cracking and other undesirable effects so apply lightly and build it up as you go.
Make sure each coat has dried completely before you apply the next one!
NOTE: It has to be said here that you may or may not want to sand the final few coats. It’s personal preference really. However and here’s the exception to the rule, if you intend to finalise the image with a think clear coat (like a cat’s cornea) for a solid finish sanding the gesso is essential. Otherwise you may find little pits in the clear coat or the clear may take on the texture of the underlying canvas textile. These issues can be fixed but will take time, so sanding the gesso will save you the time and effort later.
Personally I don’t always find it necessary to sand but sometimes i do. Again it’s personal preference.
Step 3.1 Save time, effort and gesso by prepping multiple canvases
You can do canvases quickly this way.
Personally I get 2 to 4 canvases ready for their base coats so when one, two or three are drying under the fan I can take another outside and keep spraying then swap and carry on spraying.
And there you have it.
If I can think of anything else I’ll edit this and add it.
Feel free to ask questions too.
Happy Prepping!!!!!!!!!!!!
Canvas storage
To help prevent warping (if you intend to keep them for while before painting), store canvases vertical or lying down on a flat surface. Also, if possible, don’t expose them to high or low degrees of humidity.
What to do if the gun splatters big splotches of gesso on your canvas
Get a paper towel and gently pat the affected area. This does not require pressure. I fold the towel or scrunch it up a little and use the bit that freely sticks out. (see image below) pat pat pat pat pat pat pat. Do not rub. use the weight of the towel not your hand.
Correct (using towel weight)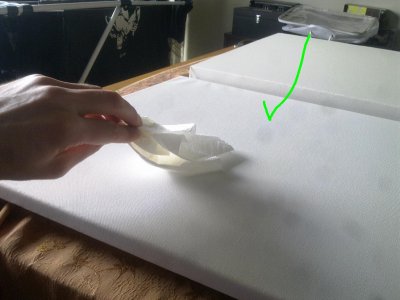
Incorrect (using hand pressure)
Always prep canvases with a smile
NOTE: You will need a good breathing mask for this as the binder will insure gesso will stick to the skin up your nose and sinus for weeks. I haven’t heard of anyone crying tears of gesso yet but anything’s possible. You should already have a good mask for airbrushing anyway which will be fine for this!!
NOTE2: Most canvases today come “pre primed”. I highly recommend you still gesso them yourself. They use very little to prime and the quality of their primer is questionable. You will find the colours pop much more if you take the following steps.
Step 1 Canvas assembly
To assemble the canvas we must first complete the stretching process.
Apply PVA (wood glue) to each of the wedges provided with the canvas.
If you’re not confident enough to use glue, that’s ok. Follow the same procedures listed until you get more comfortable with assessing canvas tension.

Insert each wedge as shown in the instructions that comes with the canvas. This requires a gentle tap with a hammer being carful not to allow the hammer to run along the back of the canvas as this will create push marks. Placing something flat and solid on the back of the canvas will help prevent this (like a clip board).

Start at one corner then work your way around the canvas in cross/diagonal fashion rather than clock/anti-clock wise.
Also, start with the bottom slits then when all the bottom ones are filled do the same with the top slits.

Once all the wedges are in with glue and gently hammered you should be able to hold the canvas by the frame at the back and gently tap the front part of the canvas in the middle with your hand (Like one would with a drum skin) and feel/hear some slight tension.

Now, with the PVA glue fill in any gaps that may appear at the corners where the wedges are. (This shouldn’t really happen; if it does you may have inserted the wedges with too much force.) Also, if the canvas has a single brace or cross brace, inspect them and if there is a gap fill them in with more glue.
I use the cardboard label that comes with the canvas to apply, and smooth off the glue for a neat finish.


NOTE: do not get any glue on the canvas itself. Not on the front. Not on the back. As some paints will not be able to paint over it and you might end up with white spots that cant be painted over!!
NOTE2: Be careful not to make the tension too tight as this will lead to the frame warping. Once you coat the canvas in gesso it will shrink a little more. You’ll have to find through your own experience what the correct tension should be.
Step 1.1 Do this if the canvas is warped (otherwise move to step 2)
Once all wedges are glued in place and all hols are filled, before the glue dries, keep the canvas face down and put some weights on each corner. I use water bottles for this, but anything heavy and clean will do.

Step 2 Gesso preparation
Get your hands on your favourite brand of gesso. The more liquefied it is when you buy it the better in my experience. But it may differ depending on the brand. Trial and error is the only way to be sure here. The main thing here is to use a water based gesso, otherwise you’ll have to use other cutting liquids to think the mix out…. I don’t have any experience with that… maybe someone who does can make a little tute about it?
Next, get a clean (sealable) bottle and, to save potential confusion in the future, label it “Pre Mixed Gesso – Ready to spray!!”
In it pour the following ratios, 70% gesso 15% water 15% binder medium. These percentages may vary according to brand but this is a good mix to start if you’re not sure. Some thinker gesso's might require as much as 30% gesso, 30% water and 30% binder, if it’s too thick or too thin adjust ratios accordingly and make a note of it for next time.
NOTE: always put the same percentage of binder medium as you do water. So if you change it to 60%gesso it would then be 20% water and 20% binder. Easy.
Step 3 Spraying
Before spraying gesso insure the glue has fully dried, this may take a day or two depending on the climate. After you have applied the gesso it is also a good Idea to leave the canvas flat and for a week or two. This will allow the canvas frame to settle in to it’s new tension and allow you to notice if there are any issues.
Shake your “ready to spray” bottle very well.
Then put it into a HVLP spray gun. Personally I have a cheap ($30) gravity feed HVLP with a 1.4mm setup which I use specifically for gesso base coats and final clear top coats.


NOTE: Make sure the gun is well cleaned before going from gesso to clear tops coats…. Otherwise you’ll reach a new high score for cursing combinations.
NOTE2: Most spray guns come with a little internal filter. Make sure this is in the gun!!
Spray a dust coat. This is also known as a dry coat because it is a very light application. This is done to “bridge” between the canvas and the next coast you will apply. If you skip this dust coat (not recommended) you may find adhesion issues.

Next put the canvas in front of a fan to dry (any clean fan will do). This first dry coat will take about 1-2 min to dry. How will you know if it’s dry?? When the gesso is still wet it will have a gloss shine to it when viewed at an angle with lights. Once it’s matted out again it’s ready for the next coat.

Then spray more coats, wetter and wetter (thinker) until you’re happy with the surface coverage. This takes a little time but as you may know applying too many think coats from the start may cause cracking and other undesirable effects so apply lightly and build it up as you go.
Make sure each coat has dried completely before you apply the next one!
NOTE: It has to be said here that you may or may not want to sand the final few coats. It’s personal preference really. However and here’s the exception to the rule, if you intend to finalise the image with a think clear coat (like a cat’s cornea) for a solid finish sanding the gesso is essential. Otherwise you may find little pits in the clear coat or the clear may take on the texture of the underlying canvas textile. These issues can be fixed but will take time, so sanding the gesso will save you the time and effort later.
Personally I don’t always find it necessary to sand but sometimes i do. Again it’s personal preference.
Step 3.1 Save time, effort and gesso by prepping multiple canvases
You can do canvases quickly this way.
Personally I get 2 to 4 canvases ready for their base coats so when one, two or three are drying under the fan I can take another outside and keep spraying then swap and carry on spraying.
And there you have it.
If I can think of anything else I’ll edit this and add it.
Feel free to ask questions too.
Happy Prepping!!!!!!!!!!!!
Canvas storage
To help prevent warping (if you intend to keep them for while before painting), store canvases vertical or lying down on a flat surface. Also, if possible, don’t expose them to high or low degrees of humidity.
What to do if the gun splatters big splotches of gesso on your canvas
Get a paper towel and gently pat the affected area. This does not require pressure. I fold the towel or scrunch it up a little and use the bit that freely sticks out. (see image below) pat pat pat pat pat pat pat. Do not rub. use the weight of the towel not your hand.
Correct (using towel weight)

Incorrect (using hand pressure)
Last edited by a moderator:

