is there an actual tutorial for the leopard?

Clutch

Needle-chuck Ninja
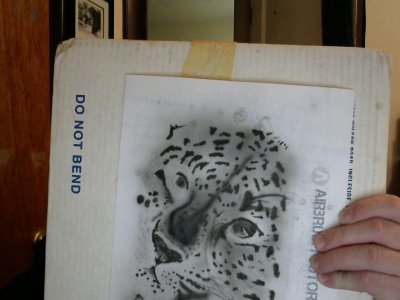
I have the reference pics and the beginner pic but is there an actual step by step or vid tutorial that goes with this? I gave it a shot lastnight and I was having a real issue keeping my blacks from going to dark right out of the gate...

any suggestions?

i was using createx illustration black and w500 reducer
badger patriot 105

air pressure up and down between 50 and 15 trying to find the easiest smoothest flow.. really depends on how gunked up my nozzle is i guess :(.. I find that it sprays AWESOME for about 5 min then i lose pressure in the flow but my airpressure is the same.. then all of a sudden im spraying to dark again.. Kind of frustrating
 

Attachments

  • Picture 1.jpg
    Picture 1.jpg
    192.9 KB · Views: 56
@_fly_ Thanks again hoss. Those helped alot as well as dropping my pressure to rock bottom and i used a very highly reduced comart trans black. Still just working at t but here is where im at. Again huge improvement. Thank you

Once you have the reference C, you can print it out as large as you like to make it easier for yourself, what you have now is probably a little bigger than the postcard size we use for Paint Pals, if you don't have a projector or software that allows to make your images bigger, you can use programs like posterazer to make a larger reference, you can find posterazer here http://posterazor.sourceforge.net/index.php?page=download

But considering how small your doing it, looks pretty good, so if your comfortable doing it at this size just take your time with it.

If you are having intermittent problems with your air flow, it is possible that the your airflow is being restricted in some way, one cause commonly overlooked is the the little ring of space between the nozzle and nozzle cap, you can see in this image the cap and nozzle exploded so you can get an idea of what I mean, although I'm now sure if you can actually remove these parts for inspection your, someone else who is familiar to the brush may be able to advise you better than I can

1843_Patriot105-1.jpg
 
@Madbrush hey thanks for the insight. Didn't know i was supposed to make it bigger ;). Its on a normal piece of printer paper. I have all sorts of image software but im not familiar with the whole stencil making/using thing. I would have loved a larger target to paint but im pretty happy with where i got on this one :). If you have any real good outline/stencil tutorials on hand to link that would be awesome. If not ill keep searching.
Thanks again

You are doing fine with what your doing now, but if you wish to try it again bigger in the future all you have to do is enlarge it, if you use the posterazer software it is automatically printed out so that can overlap and piece together four sheets of normal printer paper for example, after that you can simply cut out the shapes from this and use it as a stencil for mapping on a bigger and better substrate.

Printer paper is fine for practising your different strokes and such, but it doesn't allow you to take advantage of erasing and scratching techniques, take a look at some the tutorials in the SBS section so you can get an idea of all the techniques and time saving tricks there are available to you.

This particular tutorial was made when Mitch did almost everything with airbrush only, but there are many different ways to reach the same point or conclusion, it is a simple process of choosing the ones that fit your own needs, even Mitch has changed his approach and is using other techniques and to astonishing effect.
 
Looking good clutch! I actually find it easier to work on a smaller size (not too small though lol) as I find big sheets of white space a bit intimidating - but that's just me, I am what is technically known as 'a bit odd' lol When I was starting out I found that it also kind of forced me into getting cleaner, tighter fine lines etc. I found it useful as I usually paint on bikes so have limited space anyway, and so started as I meant to go on. But I probably gave my self some extra frustration, and I think it took me longer to get to a level I was happy with doing it this way. (Although we are never happy are we, and always want to so better :))If you are happy at that size then it's all good, and it certainly looks like you are doing well.

However as our Mr Mad says you can go much bigger, and it will help you refine your strokes, and blends, and start to nail texture techniques and get that crucial trigger control, and muscle memory, which you can then apply to whatever size you like.
 
He looks good Clutch, keep it up.

I just did my second attempt at the leopard, that's why I knew where they were.
Mines no better than my first but no worse.
I should try a small one instead of A2 and see how that makes a difference to my end result.

Anyway, glad I could help
Peter
 
Hey does any have the reference image as I've been to the above link but it appears not to work.
Thank you in advance
Beginner-James
 
Back
Top