JuanRi
Gravity Guru
Let's see if I can explain how I make needles. As always, this works for me personally, it may not work for you, but I hope it does. In this tutorial, sharp material and tools are used, please take all the necessary precautions not to hurt yourself, you could still have an accident, be careful.
I've been studying all the posts on DaveG needles, awesome source of wisdom, thanks so much for sharing your knowledge, lucky to be able to read you.
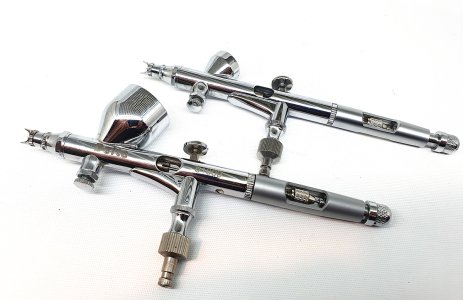
Some initial considerations: I made needles that fit Aerograph Super 93, Super 63 and Sprite airbrushes (nozzle 0.12mm). But perhaps you can adjust this procedure to your own needles.
The diameter of the needle's body of these airbrushes is 1.3mm if I'm not mistaken. I got some 1.2mm needles, which were the most similar to the original ones. These needles are used in surgery and are called Kirschner wires. They may also be called trocar pins. They come in various diameters and sizes, and are made of excellent quality stainless steel (316LVM also called AISI 316LVM steel). I've read that this steel has industrial applications as well, so I suposse it can be obtained through several ways on internet. One notable difference is that the steel of the Kirschner wires is harder than that of the original needle, and it can be polished very well. My impression is that the original needle is easier to bend than the Kirschner wires.
.jpeg")
I bought 10 needles of 30 cm each (€52/$50 total price). I can make 20 airbrush needles from these 10 Kirschnner needles. May be you don't need this amount of needles and you can save some money. I use them on 4 airbrushes... not as many as DaveG's, but not bad,
The first thing is to cut the needle as needed, in my case, in two halves (15cm each).
The second is to sharpen the needle. With the Dremel attached to the table and a stone bur, the needle is sharpened as close as possible to the original tapering.

I have tried to sharpen the needle with sandpaper only, but it did not work for me, since steel is very hard. With only the Dremel and a stone bur I achieved a reliable sharpening, very patiently and very slowly. It is important that the Dremel is at the minimum speed and that the pressure of the needle on the stone is done with the finger. The angle with the surface's bur must be as close as possible to the original, I am doing it by eye and finally it's achieved! Be patient and don't rush. It can take 15 minutes or so to have a sharp needle, but I think it's worth it. What I do with the Dremel is use it as a lathe, I attach it to the table as in the photo.
.jpeg")
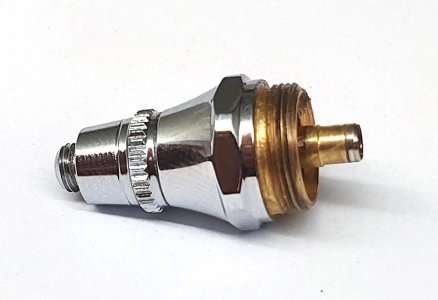
At the same time the diameter is reduced, I am testing if the tip fits the nozzle well and the length of the tip that comes out of it.
When the tip sticks out of the nozzle roughly like the original (although a bit more, because it's hard for me to taper just like the original) I polish it.
.jpeg")
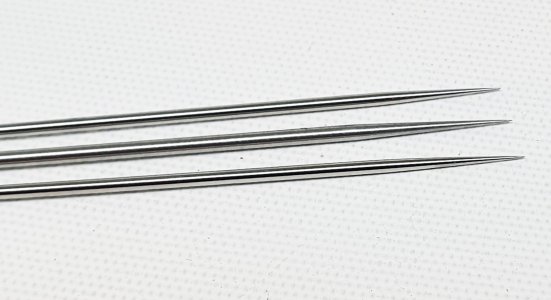
Above: only the needle at the bottom is the original. The rest of them has been polished yet. You can notice the difference on tapering between the original one and made ones. On painting, I didn't notice any difference.
To polish it, I start with 500 grit wet sandpaper, then 2000 and finish with 5000, and I look with a magnifying glass to see if it is well finished.

I think the needle's polishment has been treated several times in the forum. Perhaps there's another way to do it that adjusts better to your own goal. To me I obtained better results taking the sand paper between the fingers and then rotate the needle.
.jpeg")
There are some differences between them but they work fine.
I hope you can take profit from this tutorial and thank you for reading it.
I've been studying all the posts on DaveG needles, awesome source of wisdom, thanks so much for sharing your knowledge, lucky to be able to read you.
Some initial considerations: I made needles that fit Aerograph Super 93, Super 63 and Sprite airbrushes (nozzle 0.12mm). But perhaps you can adjust this procedure to your own needles.
The diameter of the needle's body of these airbrushes is 1.3mm if I'm not mistaken. I got some 1.2mm needles, which were the most similar to the original ones. These needles are used in surgery and are called Kirschner wires. They may also be called trocar pins. They come in various diameters and sizes, and are made of excellent quality stainless steel (316LVM also called AISI 316LVM steel). I've read that this steel has industrial applications as well, so I suposse it can be obtained through several ways on internet. One notable difference is that the steel of the Kirschner wires is harder than that of the original needle, and it can be polished very well. My impression is that the original needle is easier to bend than the Kirschner wires.
I bought 10 needles of 30 cm each (€52/$50 total price). I can make 20 airbrush needles from these 10 Kirschnner needles. May be you don't need this amount of needles and you can save some money. I use them on 4 airbrushes... not as many as DaveG's, but not bad,
The first thing is to cut the needle as needed, in my case, in two halves (15cm each).
The second is to sharpen the needle. With the Dremel attached to the table and a stone bur, the needle is sharpened as close as possible to the original tapering.
I have tried to sharpen the needle with sandpaper only, but it did not work for me, since steel is very hard. With only the Dremel and a stone bur I achieved a reliable sharpening, very patiently and very slowly. It is important that the Dremel is at the minimum speed and that the pressure of the needle on the stone is done with the finger. The angle with the surface's bur must be as close as possible to the original, I am doing it by eye and finally it's achieved! Be patient and don't rush. It can take 15 minutes or so to have a sharp needle, but I think it's worth it. What I do with the Dremel is use it as a lathe, I attach it to the table as in the photo.
At the same time the diameter is reduced, I am testing if the tip fits the nozzle well and the length of the tip that comes out of it.
When the tip sticks out of the nozzle roughly like the original (although a bit more, because it's hard for me to taper just like the original) I polish it.
Above: only the needle at the bottom is the original. The rest of them has been polished yet. You can notice the difference on tapering between the original one and made ones. On painting, I didn't notice any difference.
To polish it, I start with 500 grit wet sandpaper, then 2000 and finish with 5000, and I look with a magnifying glass to see if it is well finished.
I think the needle's polishment has been treated several times in the forum. Perhaps there's another way to do it that adjusts better to your own goal. To me I obtained better results taking the sand paper between the fingers and then rotate the needle.
There are some differences between them but they work fine.
I hope you can take profit from this tutorial and thank you for reading it.