My guide to invisible blacklight paint

Robbyrockett2

Air-Valve Autobot!
So , I don't have a ton to contribute to the forum as an airbrushing newbie but this one odd area I've got some experience with that might be useful to someone else here.

What are Invisible blacklight paints:
Invisible blacklight paints are just either clear or white under normal lighting but react and show color under blacklight (UV).

Thinning:
Nearly all are water based acrylics or water based urethanes and can be thinned with just water
or whatever you would use on another water based paint. None are very thick to begin with
, the higher the quality the thinnner they are to begin with. (UV pigments dont thicken the paint much and are incredibly expensive, the thicker the paint the less vibrant it will be)
No matter which paint it is plan on doing two to three coats when spraying to get solid coverage.

Colors:
They are available in white, red, yellow, green, blue, purple, orange and black...Yes black!
Black makes it possible to create a change in the image under UV

Mixing colors:
Mixing with normal paint
Both white and clear versions of these paints can be tinted with normal paint colors, in this situation the white versions blacklight color is hardly affected by the color of the tint, so you can have a yellow spot that glows white or a light green spot that glows red in UV. The clear versions will be affected by the color it is mixed with but you still have some variation, for example you could have a solid red area that turns into . a light pinkish purple. In either case mixing will dull the glow. Sometimes that is desired as you can make it so you can see the color but it doesnt really appear to glow.

Mixing with other invisibles
Invisibles can be intermixed to get other colors however its is an additive effect not subtractive like normal paint. For example mixing any color with white will just get you white since white is already a combination of all colors. It mixes the way actual colored light mixes.
For some reason orange, as made by the manufacturers is a very very dull glow but mixing yellow and red is a bright orange.

Brand specifics.....
Quality and attributes between brands varies greatly. Here is where I can give the biggest pointers aside from lighting tips. To be continued in my next post........
 
I will cover four brands here that I have experience with.
Wildfire
Tri-art
Blacklightworld
Neon Nights

Wildfire is the premium brand, Its entire line (including the visible paints) is truly the most reactive line of UV paints I've used but they are expensive and you cant get less than 4 oz. consistently. I think they've done away with 1 oz. sizes.
There are three colors they have that i will not use from any other brand
Black, White, and Green.

No companies black actually turns black, What it does is block UV light... (thus appearing black in a dark room I'll cover this more later.) Wildfire is best at this by far and away. A single somewhat thick coat is all it takes. The next closest competitors black can take 6 to 8 coats.

Wilfires white is the only white that is white, all others are varying degrees of blue.

Green, green pigment is incredibly expensive and even wildfire struggles to make their green purchasable ,though still more expensive than other colors It is the only brand i've tried that you can really distinguish green from yellow.


Tri-art has an acceptable line of visible blacklight paint at reasonable prices but the only real invisible one they have is UVfx medium
It is supposed to react white however it is actually one of the bluest blues Ive ever seen in a UV invisible paint and i use it as such. The matte version isn't completely clear, as you would expect its kind of frosty but its very reactive and can go on quite thin which means it's still invisible on most surfaces.


Blacklightworld has a reasonable line that is also relatively cheap and can be had in 1oz. bottles .
Their red color is actually exceptional! It is very red and can make a good substitute for for wildfire red (which has supply shortage problems quite often) their green and yellow like almost all other brands is nearly indistinguishable.

Neon nights is budget invisble UV paint and it shows. All of their colors are fairly weak except for the high end of the spectrum where almost all of these paints are ok, like yellow and green. Their red is basically pink their blue is what most places call white and their white not a much lighter shade of blue. They come in little semi opaque bottles with no color label made of plastic that has a blue tinge in blacklight so you have to open them sometimes to tell what color they are.


Next post....... Lighting, Application and color test page photos.
 
I'm going to write up lighting first and then take a break for the evening.
In most cases you will want ONLY FLUORESCENT blacklight sources. UV light is approximately 325-425 nM wavelengths. Incandescent party blacklight bulbs dont work they just use a filter to only let UV light through the glass but they dont produce much in the UV wavelength in the first place. LED blacklights tend to put out only something like 395nM and even the rare ones that are made to cover down to 365 are not very strong below 395. This means they will only make the colors at the higher end of the spectrum work like yellow and faux green which will then just be yellow and to a lesser extent blue, any other color will not work or at least will be very faint . White will turn yellow since not all the colors are activated.

No plastic covers over your light. Most plastics have UV blockers put in them to protect the plastic, the UV blockers work better and better the lower you go on the wavelength. So while Yellow and blue may still work your other colors will not. ( most LED sources are plastic or have plastic covers)
If you're using ceiling lights than you will want the type of cover that is just a grate and not a full diffuser.

You want to make sure that other than the blacklight other light sources are minimized as much as possible. Other light will dull all of your effects and make black be more like a milky grey-brown shed affected by whatever color is under it.

All of these paints degrade badly in sunlight so no outdoor use unless its a haunted trail or something where it can be covered or taken indoors during the day. Try to hang paintings somewhere they arent blasted with sun through the window.
 
Last edited:
Thanks for sharing, i have some spectra-tex black light paint that i must try some day. Don't have a black light to make use of it though lol
 
So Application, I'm just going to cover a few specifics to this paint.
It must go on VERY thick especially when thinned to be sprayable, For that reason Dont expect a lot of detail, youre going to need quite a few coats to get it solid and you may be forced to just Frisket and then do a little shading. In any event Its going to work best on a pretty large scale.

Black will only black out normal colors if they are painted over with white or some other bright color first
so if you want to change the image or take an element out of it you will ned to first paint it white or blue and then paint it black. then you can use any glow color you want over top of the black.

Carefully combining your visible and invisible elements can make for some awesome dual images. Since no UV light is pure UV you can of course still see some of the things you can see under normal light.

You can create a triple image by using invisible glow in the dark paint and then going over it with invisible black UV paint. For example You could do a beach scene then use invisible glow in the dark pink and orange to create a sunset, then use invisible UV black over the Glow in the dark paint , then use invisible UV colors to bring out the moon and stars in blacklight. So you get daylight in normal light, sunset at dark and nighttime in the blacklight.

There is a fine line between having this paint be thick enough to create a solid effect and having it be so thick that your daytime image is all milky looking..... experiment some before you do a project that matters.

All of this stuff is a compromise, you will feel like your trying to paint with crap you made from berries and tree bark and urine. It's not nearly as easy as using regular paint. It can be very limiting.
 
Finishing......
You will want a clear over your whole image when you are done since the "invisible" paint will change the sheen and often create lines beacause its been stenciled on so thick.
Don't use any clear designed for outdoors or that is made to preserve paintings. They have UV blockers. You are effectively spraying your whole piece with a weak UV black. Polycrylic is a good clear, liquitex gloss varnish also works. Basically steer clear of anything with strong UV inhibitors.
 
Finally... Whats a post worth without pics?....

Heres something i did as a very quick and dirty example
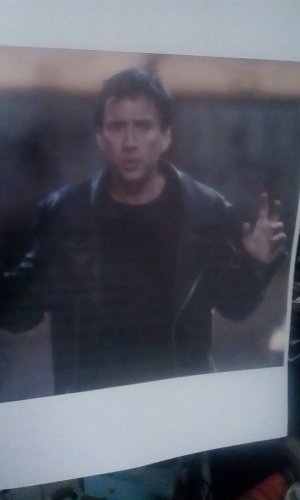
Heres a photo i printed of Nicholas cage and painted some Invisible features on
IMG_20171004_170852.jpg

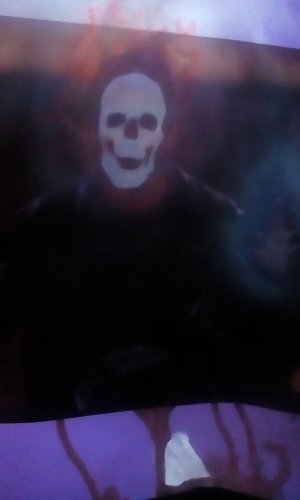
And heres the same photo in blacklight

IMG_20171004_170946.jpg
 
I've got some photos of a nature scene I'll Post up later and then ill make some color cards out to illustrate some of the different paint.
 
One other tip, the pigments in these things settle out quickly, so shake it before you put it in your cup, even its only sat for 15 minutes.
 
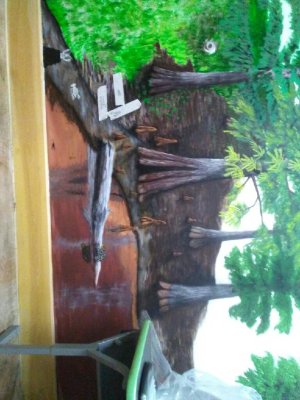
So here is an part of an educational mural scene in progress
image-2017-08-28-10-41-41.jpg
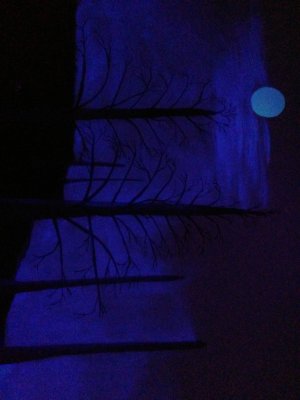
and the same scene in blacklight also in progress
image-2017-08-02-18-15-26.jpg
The moon is wildfire white and that blue glow is tri-art UVfx medium
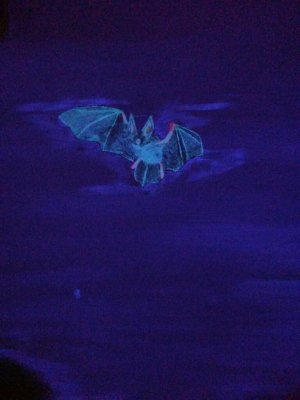
and here is rafinesques big eared bat
image-2017-08-28-10-17-47.jpg
His entire silhouette is done in white first then the black is painted in

Sorry I don't have the completed pics available yet but these illustrate the point for now.
 
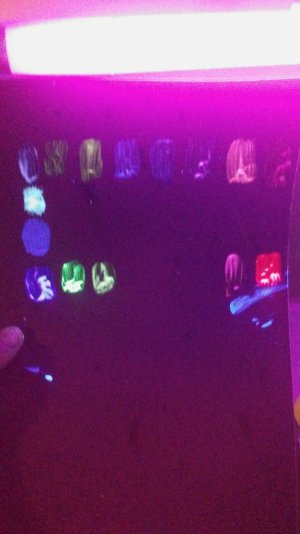
20171004_200154.jpg
So it is absolutely impossible to get a good representative picture of these paints with the equipment I have.
But this one can show you a few obvious things.
That top row is all the neon nights colors they are right up against the blacklight and still show weaker than anything else on the card.
All the way to the right is their red
Bottom row is blacklightworld colors.
The left column are the whites.
the second one down is Wildfire white
the third one down is UVfx medium, its on thin and still shows solid blue
The bottom right you can see just how brilliant red is in blacklightworld paint
the yellow and green are more distinguishable in this picture than in real life.
Sorry i dont have any more wildfire at the house right now.
So even with this photo and the inherent issues in photographing blacklight paint you can still draw some information from it.


That is all, I hope this gives you guys a fair idea of what to expect from these paints or points you in some sort of direction if you decide to try them.
I hope someone does try them.
I was really on my own learning this stuff. Believe me ,search around.... there is hardly any info on this stuff out there on the web. The few people that work with these paints treat it like its some sort of trade secret.
I'd be happy to answer any questions.
 
Looking for an answer to a completely different question and stumbled upon an answer to a question I probably would ask in a couple of months. Lol. How did you know I was going to ask this?lol. I am planing on doing a painting in a daughters room with an under water scene and was playing around with the idea of using Blacklight coolers to give it a cool effect and maybe double as a night light.
Thanks for the info.
Blacklight coolers?
 
Oh, I see. Yeah you would have some issues with LED and be limited in what colors would actually be brilliant, or react really at all.
But yeah, I'm glad this turned out useful to someone else.
Oops , colors not coolers, nevermind.
 
Great thread, don't know why I didn't catch this before. Very informative. There is a future project (planning started a while ago with a mid 2018 completion date) that was going to include some uv / blacklight features and highlighting. The problem is it would involve exposure to sunlight, which I now know would degrade the pigments. You have just saved me a ton of frustration, dollars & disillusionment. Thank you!!! Now I have time to rethink where the outcome will be. Thankfully, I didn't promise any "dynamite" effects and might be able to dazzle and amaze differently...
 
Back
Top