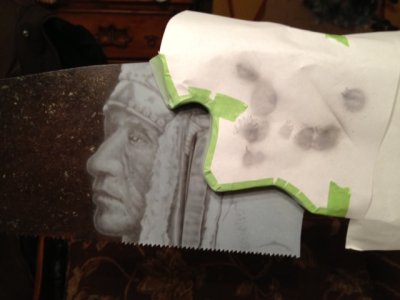
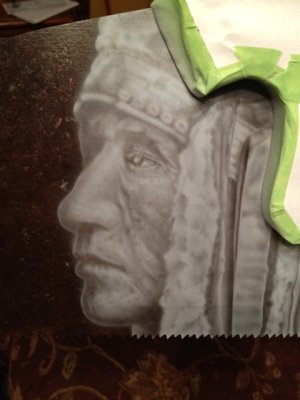
Native American Theme Handsaw

R

Russ Allen

Guest
Hey everyone, here's one of the many saws I've been doing. Thought I would do a tutorial on this one. Hopefully it will turn out okay when Im done. Im doing this for a local Chamber of Commerce for them to auction off and hopefully make some money to keep their doors open. I told them I would donate it to their cause but they insisted on paying me, so we'll see if it will help them any. They just said they wanted an Indian, lol, so the rest is up to me. Will definitely be adding an Eagle in the mix among several other things.

Materials: Airbrush-Badger Krome
Paint-Etac Private Stock (Paynes Gray), ETAC AG Modifier
Reduced with water
Freehand sheilds including: Blue shop towel torn in half, lol - Cheap Bristled brush (china, yellow bristles wooden handle)
Airbrushed at 15psi
Step 1: Sketch

Normally I would have all the sketches for the project done first but with 2 days notice I havent really had much time to put any thought into it yet, lol. So I will be sketching again once I finish the Indian
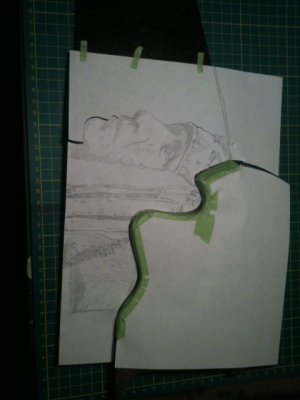
Indian Saw Sketch.JPG
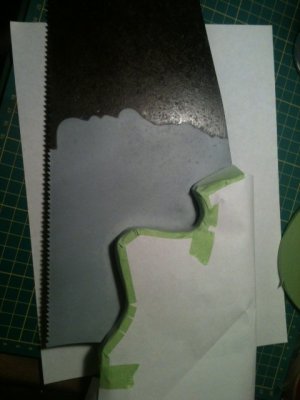
I cut the sketch so that the negative piece will cover the handle of the saw, using painters tape or automotive tape I tape the sheild over the handle.

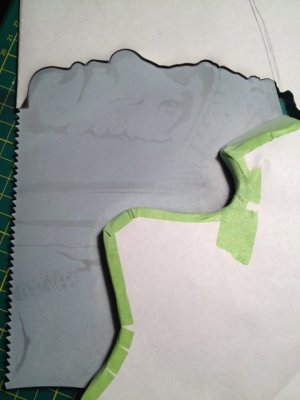
Step 2: Cut the outline of the face and spray the white base
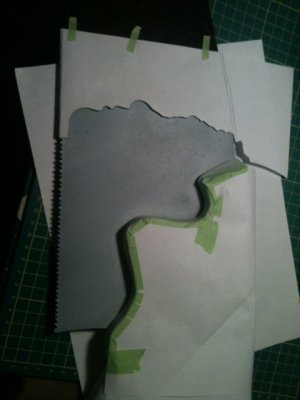
Indian Saw Step 1.JPG Indian Saw Step 2.JPG

Do the white base in several light layers. Theres about 7-8 layers here, light coats so the waterbased paints cures evenly. If youre using solvent based its not as detrimental.

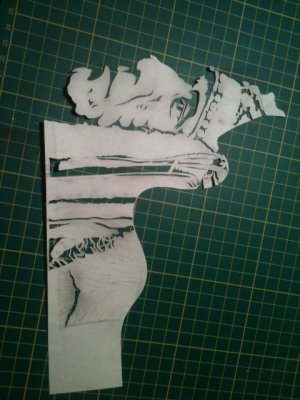
Step 3: Xacto your sketch
Indian Saw Step 3.JPG

Here you can see I took my sketch and with an xacto knife, I cut out all the darkest sections of the sketch
 
Last edited by a moderator:
Step 4: Use the stencil you just made to get your reference lines (guidelines)

Indian Saw Step 4.JPG Indian Saw Step 5.JPG

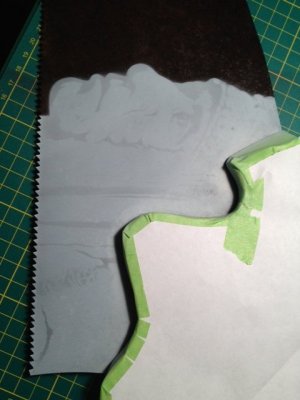
Here I used about 6 drops water to 1 drop Paynes Gray (ETAC), laid the stencil in place and VERY LIGHTLY sprayed over the stencil. With the stencil in place, you cant even really tell that theres any paint there, lift your stencil just a bit at the bottom to make sure you are dark enough. All you need is just dark enough to tell where everything is, this will all be covered up once you start the painting.

Step 5: Start laying in your shadows and details

Indian Saw Step 6.JPG Indian Saw Step 7.JPG

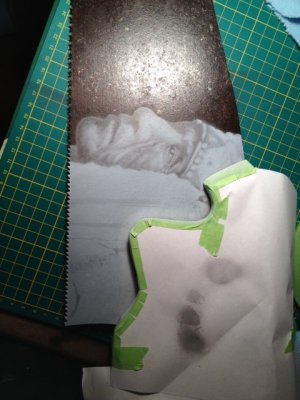
Try not to go too heavy with your dark. Here I used 12 drops water, 4 drops Paynes Gray (ETAC) and 1 drop AG Modifier (ETAC). Very important to use low pressure (15-20psi) with this mix and to build your shadows slowly otherwise you'll build the paint up too quickly and you'll get runs/spidering (which I did have a few, lol, Im not perfect!). Everything is freehanded to this point as far as the shading except for the right side of the face, I used a Blue shop towel that I tore in half to make it fuzzy to give a better texture on the fuzzy feather. Remember LIGHT LAYERS, lol


Indian Saw Step 9.JPG
So this is where I am after 4 hours, oh, ya, did I mention Im slow, haha, good thing its just for a hobby for now, lol.

If I have time, I will come back in and darken the shadows and add highlights but I seriously doubt I will have time on this one, we'll see.
 
Last edited by a moderator:
Yup, one more time, this is it I promise, OH, does this count as my portrait for the contest??? haha
 
LOL I am looking forward to more picture:D it is a great how too so far.
 
looking great, i would never have thought of using an old saw as a canvas, bloody great work
 
Thanks for the tutorial Russ, great to see how you tackle a job!! And your not the only slow coach, i'm also ending up with more hours on a project that initially planned for most of the times, but hey it's the result that counts.
 
Thanks Micron and Squishy! Really appreciate that.

Thanks troppo! My grandfather gave them to me over 4 years ago and said I might wanna paint something on them some day. Well, they sat under an old oak tree outside for 4 years until I decided to go get some and do some for Christmas presents! Now Im hooked, lol, one of my favorite canvas' now, lol. I did one for Sante Fe Steakhouse, theyre a big Restaraunt Franchise here in the US and the one saw so far has turned into over 12, still waiting for the final #'s before I start painting them all, but at $100 a pop, for me to airbrush and have fun with my hobby, purdy good change man, lol.

Thank ya just me and I agree 100%, the results are well worth the effort put toward them!!! Granted, I still have a lot to learn as Im no pro and I just do it for a hobby right now, so the extra money on the side is just icing on the cake. The way I see it, all my clients are paying me to practice on their projects haha!!! I may change my tune once I get my shop built and start doing it to pay bills, but hopefully by then I will be able to turn out the work quicker.
 
Very cool Russ, and a great tutorial so far as well!! Can't wait to see the finished piece!


Yesterday is now history and tomorrow is a mystery. Treat today as a gift, because that's why they call it "THE PRESENT"
Josh
 
Thanks Josh, appreciate it bro! I got it finished (RUSHED) but done, lol. I will try to finish the tutorial tomorrow or Monday.

Hope all has a blessed Easter, hopefully all will get some much needed family time, I know I will!! May God bless each and everyone of you and your families!!

HAPPY EASTER
 
Back
Top