Finally did my Air Cap Modification

M

Melbee

Guest
Hi Folks,
I'd already been thinking of doing this for ages and thanks to AndreZA and Flycatchr's Air Cap Mod post I drummed up the nerve to have a go.

I also used a 180 Crown Cap because I like the larger size and had ordered a few extra for my other Iwata's.

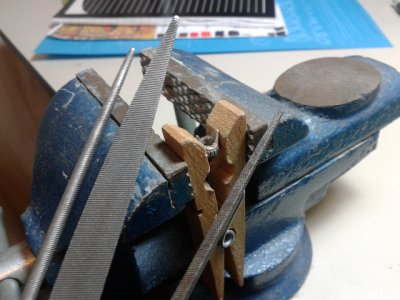
First I gripped the Crown Cap in a wooden clothes peg and then put it in my vice. Using a stone grinder type fitting in my Dremel like tool (see photo) I very carefully ground down the 2 prongs I'd previously marked (thanks for that tip Guys).
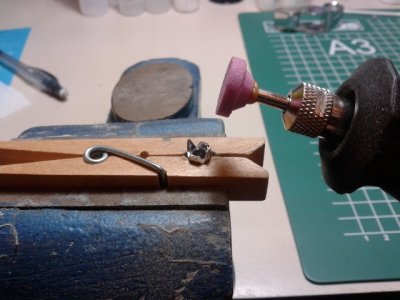
Dremel 2 prongs off.jpg

I then used some hand files to file down the base of the prongs and round the shape off a little. I was careful not to file down so low as to damage the screw threads on the inside. I also took some off the top of the 2 remaining prongs so the needle will be able to get closer to the surface yet still be protected.
Hand file.jpg

Because I had 3 of the same Crown Cap I found one that screwed on with the prongs top and bottom for this airbrush.
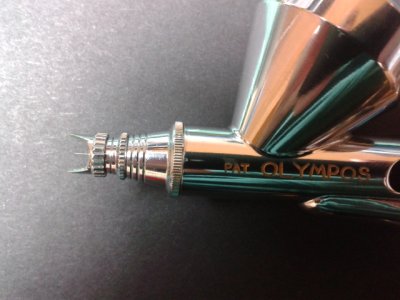
This is my finished 2 pronged modified Crown Cap which is now an Air Cap fitted to my Olympos Micron. NICE :) Feeling very chuffed.
Finished Aircap from 4 to 2 prongs.jpg

It's nowhere near as well done as the ones AndreZA and Flycatchr did but it's good enough for me (for now).

Cheers Mel
 
Last edited by a moderator:
Just got a cm-b, comes with the crown, may have to look into this option. Almost ordered one from LionArt, along with a zsolt spring, and a valve tool, but decided to wait for now.


Sent from my iPhone using Tapatalk Pro
 
Awesome, awesome job Mel. I don't see anything that does not make it look as good as mine. Polish it with super fine sand paper and it will be nice and smooth and shiny. But as long at ti works, it doe not really matters. I love the cloths peg idea. It's one of those "Why didn't I think of that" moments.
 
Thanks everyone :)

Just got a cm-b, comes with the crown, may have to look into this option. Almost ordered one from LionArt, along with a zsolt spring, and a valve tool, but decided to wait for now.

Sent from my iPhone using Tapatalk Pro

wmlepage, I have one from Lion-Art but I find it too small and I can't pick it up easily. That's why I modified the 180 Crown Cap because it's bigger and also gives more air space between the prongs for the paint to flow.

Awesome, awesome job Mel. I don't see anything that does not make it look as good as mine. Polish it with super fine sand paper and it will be nice and smooth and shiny. But as long at ti works, it doe not really matters. I love the cloths peg idea. It's one of those "Why didn't I think of that" moments.

AndreZA, thanks to you and Flycatchr for helping me do this. Yeah the clothes peg was not my idea as such because I read someone say to use one on your airbrush before you loose parts with pliers. So I was doing that to my new Airbrush air valve but in the vice not with pliers and then I thought why not put the Crown Cap in the clothes peg to work on it. So not my idea but my adaptation of someone else's advice :)
Cheers Mel
 
the krome comes with somthing similar to that. i dont like it because its hard to clean dry tip with fingers?
how do you deal with yours ?
good clean work! job well done.
 
the krome comes with somthing similar to that. i dont like it because its hard to clean dry tip with fingers?
how do you deal with yours ?
good clean work! job well done.

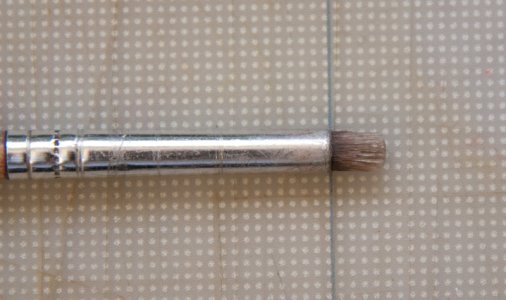
There is the picking problem, but I've always used a brush. I'll rather take an extra second to pick paint then now run the risk of have the needle unprotected.

brush_for_needle_clean.jpg
 
the krome comes with somthing similar to that. i dont like it because its hard to clean dry tip with fingers?
how do you deal with yours ?
good clean work! job well done.

I totally agree with AndreZA. I don't want to risk damaging the needle by taking the needle cap off or by picking the needle which can also damage the needle tip so I use a brush to clean the tip dry off.

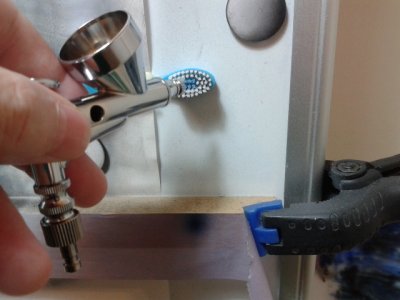
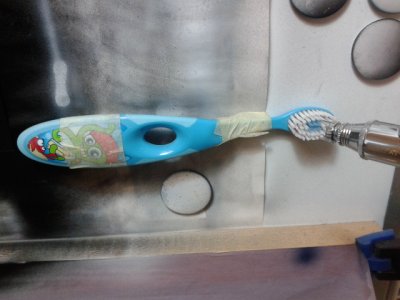
I use a soft toddlers toothbrush and I fix it to the magnetic board I work on so I don't have to stop to pick the brush up. I have taped 2 magnets on to the handle, you could also clip it on or tape it to the surface you are working on. I put airbrush cleaner onto the bristles of the brush, push the front end of the airbrush gently into the top of the bristles and move around till the needle is clean, blow of the excess liquid and test the spray on to a scrap piece of paper and continue to paint again. Takes a few seconds and my needle stays safe. Be careful where you place the brush because you can flick cleaner onto you painting if you are too close. I usually put my brush below the painting and have no worries.
Cheers Mel

20131008_142133.jpg 20131008_142258.jpg
 
Just purchased 3 of these caps of a UK seller on ebay (searched Airbrush Needle cap WD-180) $20.60 posted.

So when the Olympos shows up I will do the mod, thanks for the good guide AndreZA and Melbee.

Have a safe Christmas all

Chester
 
Just purchased 3 of these caps of a UK seller on ebay (searched Airbrush Needle cap WD-180) $20.60 posted.

So when the Olympos shows up I will do the mod, thanks for the good guide AndreZA and Melbee.

Have a safe Christmas all

Chester

Which Olympos have you ordered?
Cheers Mel
 
Same as you Melbee MP 200c, goes nicely with my HP 100c.

Going to do the cap mod to both, discovering tip dry is awkward to deal with if the needle isn't exposed.

Chester
 
Back
Top